How to Manually Select a Mobile Carrier Using Smart Roaming via CLI?
Overview
Robustel Smart Roaming Support for Products
What You'll Need
Before you begin, please ensure you have the following ready to avoid any interruptions.
- Hardware List:
- 1 x Robustel Gateway that supports the Smart Roaming feature.
- 1 x Active roaming SIM card, properly installed in the gateway.
- 1 x Computer to access the gateway's command line.
- An Ethernet or serial cable to connect your computer to the gateway.
- Software/Firmware :
- Gateway firmware version that includes the Smart Roaming module.
- An SSH client (e.g., PuTTY) or a serial terminal application.
- Information Needed:
- The IP address of the gateway.
- The username and password for accessing the gateway's CLI.
- Knowledge Needed:
- Basic knowledge of how to connect to a device using an SSH client or a serial console.
- A general understanding of what a mobile operator is and the concept of MCC/MNC (Mobile Country Code/Mobile Network Code).
Step-by-Step Configuration Guide
The entire process is performed through the gateway's Command Line Interface (CLI).
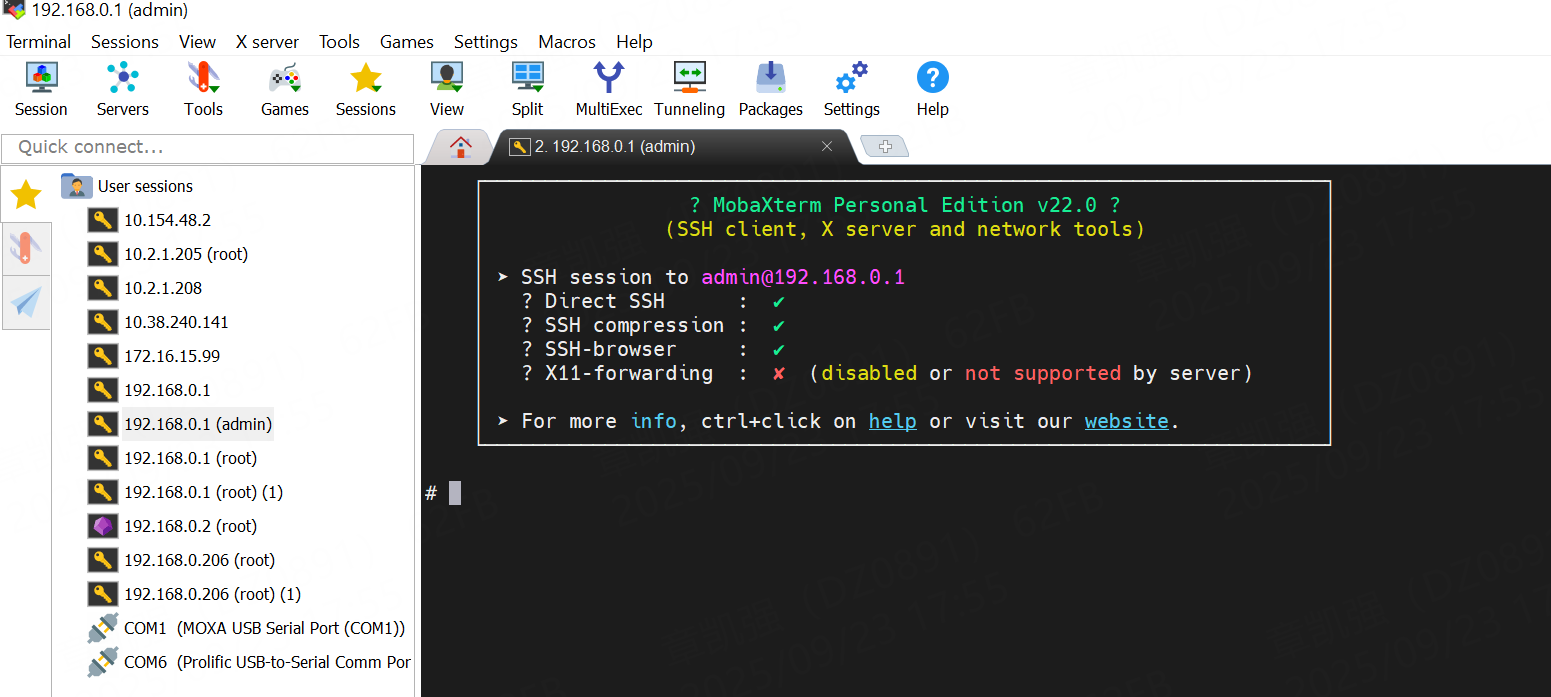
1. Access the Gateway's CLI
First, you need to establish a connection to the gateway's command line.
- Connect your computer to the gateway's LAN port using an Ethernet cable.
- Open your SSH client, enter the gateway's IP address, and initiate a connection.
- When prompted, enter the administrator username and password to log in. You will now have access to the CLI.
1.1.1. Enable Smart Roaming
To use the manual selection commands, you must first activate the Smart Roaming feature.
- In the CLI, type the following command and press Enter:
set smart_roaming enable true- This command enables the Smart Roaming module. If this is not enabled, the other related commands will not work.

1.1.2. Scan for Available Networks
Once Smart Roaming is enabled, you can scan the area to see all available mobile networks.
- Enter the following command:
show_networks- The gateway will scan and display a list of operators. The output will look similar to this:
23430:N/A;23415:N/A;23410:4G;23432:N/A;23420:N/A; - This list shows the MCC/MNC code for each operator and its available network technology (e.g.,
2G,3G,4G). In the example above, the operator23410is available with a4Gsignal. 
1.1.3. Manually Select the Desired Carrier
From the list of available networks, choose the one you want to connect to and use the select command.
- Identify the MCC/MNC code of your preferred operator from the scan results (e.g.,
23410). - Type the
selectcommand followed by the MCC/MNC code:
select 46001- The gateway will now attempt to disconnect from its current network and register exclusively with the operator you specified.

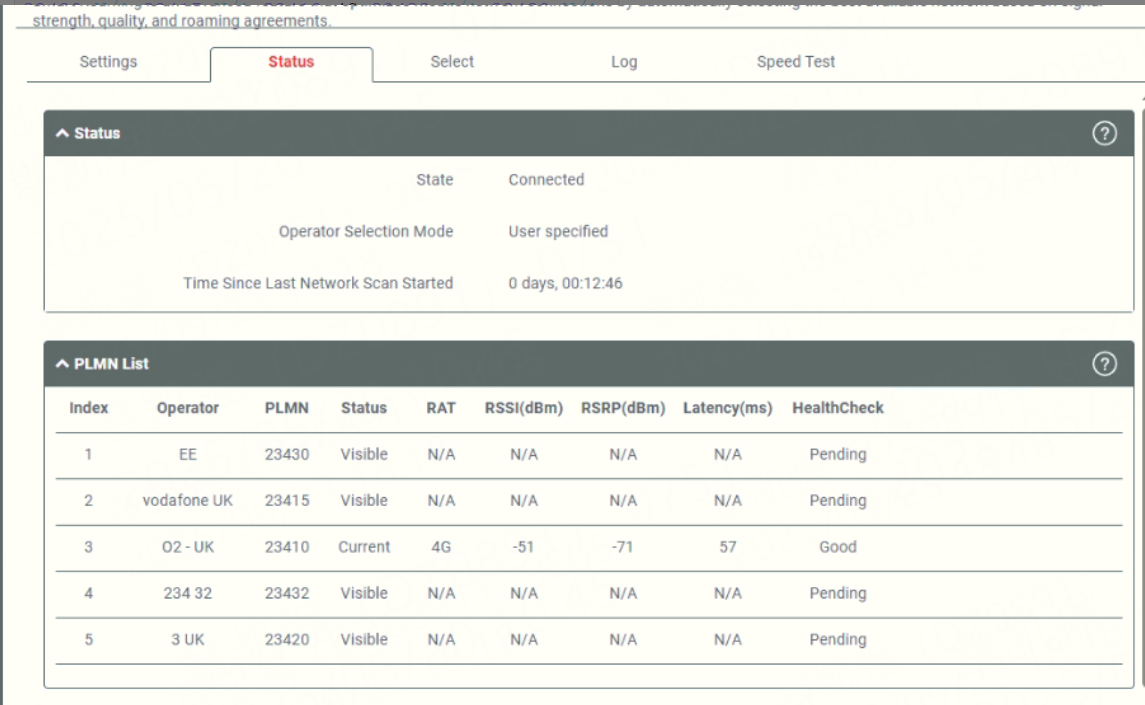
1.1. Verification & Testing
After executing the select command, you should verify that the gateway has successfully connected to the chosen operator.
- Check Method: Wait a minute for the gateway to establish the new connection. You can verify the connection status in two ways:
- Log in to the gateway's Web GUI and navigate to the cellular interface status page.
- Use a relevant CLI status command (e.g.,
show cellular) to check the current registration details.
- Success Indicator: The "Operator" field in the status should now display the name of the carrier you manually selected (e.g., "O2 UK"). The interface should show a "Connected" status and be able to transmit data.
Troubleshooting / FAQ
Q1: I ran the select command, but the gateway failed to connect. What should I do?
A1: A connection failure can occur if the signal from the chosen operator is too weak, or if your SIM card's roaming agreement does not permit access to that network. First, run show_networks again to confirm the operator is still visible and available. If it is, you may need to try selecting a different operator from the list with a stronger signal.
Q2: How do I revert to automatic operator selection?
A2: To disable the manual selection and allow the gateway to roam automatically again, simply disable the Smart Roaming feature with the following command:set smart_roaming enable false
Q3: Where can I find a list of MCC/MNC codes?
A3: The most accurate method is to use the show_networks command on-site, as this shows what the device can detect in real-time. For reference, here is a brief example for the UK:
MCC/MNC | Operator |
23410 | O2 UK |
23415 | Vodafone UK |
23430 | EE (Orange) |
23420 | Hutchison 3G |
Conclusion
By following this guide, you have learned how to leverage the CLI-based Smart Roaming feature to manually control your gateway's carrier selection. This capability is essential for troubleshooting connectivity issues in the field and for optimizing the stability of your IoT deployments that rely on roaming SIM cards.
Revision History
Version | Date | Author | Changes |
1.0 | 2025-05-20 | Hubery.Zhang | Initial document creation. |
Related Articles
Robustel Smart Roaming V2/V3: Product Support List & Setup Guide
Article Overview Smart Roaming is a critical feature for Robustel devices, enabling intelligent switching between multiple carrier networks to ensure stable and continuous connectivity. This functionality is available in two versions: Smart Roaming ...Edge Gateway Main Page
Edge Gateway Configuration & Development Your central hub for mastering Robustel Edge Gateways, tailored for developers and system integrators. From basic device configuration to advanced application development and third-party integration, find the ...How to Enable RCMS via SSH CLI?
Overview This guide outlines the steps to enable RCMS using SSH CLI commands. Ensure you have SSH access and admin credentials. Steps Connect via SSH Make sure SSH is enabled. Open the firewall for either remote SSH or local SSH as applicable. Enable ...How to Remotely Access a PLC/Camera via Robustel RCMS using RobustVPN
Overview This guide details how to securely access downstream devices, such as PLCs or Cameras, connected to a Robustel router (e.g., R1510, EG5120) from a remote location. By leveraging the Robustel Cloud Manager Service (RCMS) and its RobustVPN ...How to Disable Roaming
This guide explains how to disable roaming functionality on your cellular gateways using AT commands through the web interface. This method is applicable to the device with RobustOS and RobustOS Pro. Background While there is no dedicated toggle ...